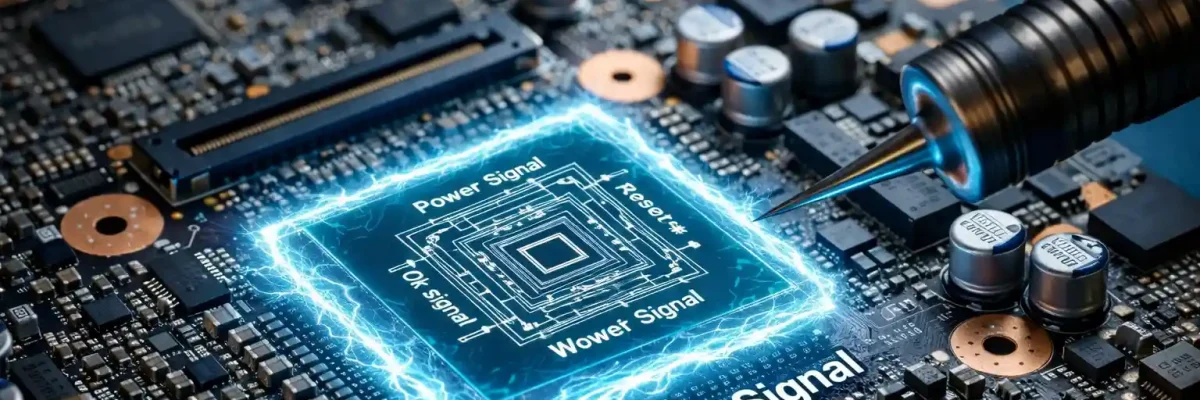
PWROK Signal Kya Hai — Chip Level Repair Complete Guide Hinglish Mein
PWROK Signal — Power OK, Boot Ka Sabse Important Gate (Hinglish – Chip Level Repair Series by Ezone Care)
📖 Ye blog Hinglish mein hai. Agar aap same topic ko English mein padhna chahte hain, to hamare partner site WeRefix.in par detailed English guide available hai: 👉 PWROK Signal Chip Level Repair – English Guide (WeRefix.in)
Introduction
PWROK signal chip level repair mein wo critical signal hai jo sabhi core power rails stable hone ke baad generate hota hai aur PCH ko permission deta hai ki ab PLTRST# release karo — yaani CPU ko boot karne do.
Agar aapne humara PLTRST# Signal blog padha hai to yaad hoga:
“PWROK PLTRST# ka direct gatekeeper hai”
Ye real bench scenario har roz hota hai:
Technician rails measure karta hai:
→ VCC3_3  = 3.28V ✅ (theek lagta hai)
→ VCC5    = 4.95V ✅ (theek lagta hai)
→ VCCCORE = 0.95V ✅ (theek lagta hai)

Lekin board dead hai.

Technician PWROK check karta hai:
→ PWROK = 0V ❌
Ye exactly wahi situation hai jahan technicians PCH replace kar dete hain — jabki PCH bilkul theek hota hai.
Is guide mein seekhenge:
- ✅ PWROK kya hota hai aur kaun generate karta hai
- ✅ SLP_S4#, SLP_S5#, VCCST_PWRGD ka role
- ✅ PGOOD aur HWPG ka concept
- ✅ Boot sequence mein exact position
- ✅ Practical measurement — multimeter + oscilloscope
- ✅ PWROK stuck LOW — step by step troubleshooting
- ✅ Common mistakes aur real case studies
📌 Ye blog hamare Chip Level Repair Series ka hissa hai: Pehle in blogs ko zaroor padhein: → Laptop Motherboard Power Wells → RTC_RST# Signal → RSMRST# Signal → PLTRST# Signal
⚠️ Important: Platform Note
PWROK signal ka naam platform aur OEM ke hisab se vary karta hai:
- Intel: PWROK, SYS_PWROK, PCH_PWROK, PM_PWROK
- AMD: PWR_GOOD, SYS_PWROK (FCH version dependent)
- Voltage: 3.3V HIGH (normal state) — Active-High signal
- Generated By: PMIC / EC / VRM PGOOD logic — board design dependent
👉 Hamesha apne board ka schematic check karo — naam alag ho sakta hai, kaam same hoga.
PWROK Kya Hai?
Simple language mein:
PWROK = Power OK Ye ek quality certificate hai — sirf “power present hai” nahi, balki “power stable hai, clean hai, aur tolerance ke andar hai” — tabhi PCH PLTRST# release karega.
Ek important example:
VCC3_3 rail = 3.0V hai Multimeter pe theek lagta hai Lekin PMIC ka threshold 3.15V minimum set hai → PWROK assert nahi hoga — board dead rahega
Isliye: Multimeter se rails OK dikhna = PWROK assume nahi kar sakte.
PWROK Kaun Generate Karta Hai?
Board design ke hisab se ye alag-alag hota hai:
Intel Platforms:
1. Dedicated PMIC (Power Management IC)
- Saari core rails monitor karta hai
- Sabka PGOOD signal receive karta hai
- Sab OK → PWROK assert karta hai
- Common on: Dell Latitude, HP EliteBook, Lenovo ThinkPad
2. EC Firmware Controlled
- EC power sequencing verify karta hai
- EC → PWROK generate karta hai → PCH ko bhejta hai
- Common on: Consumer laptops
3. VRM PGOOD Output
- Kuch boards mein multiple VRM ke PGOOD signals logic gates se combine hote hain
- Combined output → PWROK banta hai
- Koi bhi ek VRM ka PGOOD missing = PWROK LOW
AMD Platforms:
- Equivalent signal: PWR_GOOD ya SYS_PWROK
- FCH power management ya EC generate karta hai
- PSP (Platform Security Processor) bhi internally involved hota hai
Boot Sequence Mein PWROK Ki Position
Adapter ya Battery Connect
        ↓
RTC Well active → RTCRST# release
        ↓
Suspend Well active → EC power up
        ↓
VCCST_PWRGD HIGH ← Suspend well PG (always-on)
        ↓
RSMRST# release → PCH initialize
        ↓
Power Button Press
        ↓
SLP_S5# HIGH → SLP_S4# HIGH → SLP_S3# HIGH
        ↓
Core Rails enable hoti hain
(VCC3_3, VCC5, Vcore, RAM rails)
        ↓
Har VRM → apna PGOOD signal deta hai
        ↓
Sab PGOOD → PMIC/EC → PWROK HIGH ← YE HAMARE TOPIC KA SIGNAL
        ↓ (5–20ms delay)
PCH → PLTRST# release
        ↓
CPU boot karta hai
Key Rules:
❗ SLP_S4# / SLP_S5# release nahi hue → Core rails enable nahi hongi → PWROK nahi aayega ❗ Koi bhi ek VRM ka PGOOD missing → PWROK LOW → PLTRST# nahi → Dead board
🔷 PWROK Se Related Important Signals
VCCST_PWRGD (Suspend Well Power Good)
- Suspend Well ka power-good signal hai
- PCH ke liye always-on prerequisite hai — power button se pehle bhi HIGH hona chahiye
- Missing ho to PCH kabhi PWROK accept karne ki state mein nahi aata
- Board adapter connect hote hi HIGH hona chahiye — agar nahi aaya to SUS well problem hai
SLP_S4# aur SLP_S5# (Sleep State Signals)
- PCH generate karta hai
- Ye HIGH hone ke baad hi core rails enable hoti hain
- Agar SLP_S4# ya SLP_S5# stuck LOW hain → Core rails kabhi nahi aayengi → PWROK kabhi nahi aayega
- Sequence: RSMRST# HIGH → SLP_S5# → SLP_S4# → SLP_S3# → Core Rails → PWROK
PGOOD (Per VRM Power Good)
- Har individual voltage regulator ka apna PGOOD output hota hai
- Ye signal batata hai — “meri rail stable aur tolerance ke andar hai”
- Sab PGOOD → combine hote hain → PWROK banta hai
Simple Chain:
📌 SLP release → Rail enable → PGOOD → PWROK → PLTRST# Koi bhi link toota → aage nahi badhega
🔷 PWROK Signal Properties
| Property | Value |
|---|---|
| Signal Type | Active-High |
| Normal State (S0) | HIGH — 3.3V |
| Fault State | LOW — 0V (stuck) |
| S5 State | LOW — Normal hai |
| Generated By | PMIC / EC / VRM PGOOD logic |
| Goes To | PCH / FCH (input pin) |
| Timing | Core rails stable ke 0–100ms baad |
🔷 Practical Measurement
Multimeter Se
S5 State (Adapter connected, button press nahi):
PWROK = 0V → Normal ✅
(Core rails off hain S5 mein)
Power Button Press ke Baad (S0):
PWROK = 3.3V HIGH → Normal ✅
PWROK = 0V (stuck) → Fault ❌
| Condition | PWROK | Matlab |
|---|---|---|
| S5 state | 0V | Normal ✅ |
| S0 state (running) | 3.3V | Normal ✅ |
| SLP_S4# stuck LOW | 0V | SLP signal fix karo ❌ |
| Core rail missing | 0V | Rail + VRM check karo ❌ |
| Rail out of tolerance | 0V | PMIC threshold se kam hai ❌ |
| EC firmware issue | 0V ya random | EC reprogram karo ⚠️ |
| VCCST_PWRGD missing | 0V | SUS well problem ❌ |
Oscilloscope Se
Settings:
- Probe: 10X
- Trigger: Rising edge
- Time base: 10ms/div
- Voltage: 5V/div
Expected Waveform:
- Clean 0V → sharp rise → stable 3.3V
- Rise time fast — no bouncing, no slow ramp
- PLTRST# PWROK ke 5–20ms baad aana chahiye
Abnormal Signs:
| Waveform | Problem |
|---|---|
| Bouncing before settling | Unstable rail ya weak VRM |
| Goes HIGH then drops | Rail collapse under load — VRM current capacity check karo |
| Never goes HIGH | PGOOD missing ya SLP signal issue |
| Slow rise | High ESR capacitor ya weak regulator |
⚠️ Important: PWROK probe karo PCH ke input pin par — PMIC output par nahi. Agar PMIC output HIGH hai lekin PCH pin par LOW hai → trace ya component issue hai line mein.
🔷 PWROK Failure Symptoms
- ❌ Fan spin, LEDs ON — no display, no POST
- ❌ Power button reaction hota hai lekin boot nahi
- ❌ PLTRST# hamesha 0V (direct symptom)
- ❌ Board 3–5 seconds baad band (rail collapse)
- ❌ Intermittent boot — kabhi chalta, kabhi nahi
🔷 Troubleshooting — Step by Step
Step 1: SLP Signals Check Karo (Pehle)
- Power button press ke baad SLP_S5#, SLP_S4#, SLP_S3# HIGH hone chahiye
- Stuck LOW hain? → RSMRST# aur PCH check karo
Step 2: VCCST_PWRGD Check Karo
- Adapter connect hote hi HIGH hona chahiye (button press se pehle)
- Missing? → SUS well problem hai
Step 3: Core Rails Check Karo
- VCC3_3 = 3.3V exact ✅
- VCC5 = 5V ✅
- Vcore = CPU generation dependent ✅
- RAM rails (VDDQ) present ✅
- Tolerance important hai — 3.0V ≠ 3.3V PMIC ke liye
Step 4: Har VRM Ka PGOOD Check Karo
- Schematic mein har rail ka PGOOD signal dhundo
- Ek ek measure karo — kaunsa LOW hai?
- Us VRM ko fix karo
Step 5: PWROK Direct Measure Karo
- PCH ke PWROK input pin par measure karo
- 3.3V nahi aaya → PMIC/EC output check karo
Step 6: PWROK Line Check Karo (Board OFF)
- PWROK pin se GND tak resistance
- Normal: 10kΩ–100kΩ
- < 1kΩ → Short on line → PCH damaged ya shorted component
Step 7: EC Check Karo
- EC VCC present? Clock oscillating? Reset released?
- EC firmware corrupt? → Reprogram karo
🔧 Real-World Case Studies
Case Study 1: Sab Rails OK — Phir Bhi Dead
Symptom: Multimeter pe sab rails theek, fan spin, no POST
Diagnosis:
- RTC: OK ✅ | RSMRST#: OK ✅
- Core rails: OK dikhte hain multimeter pe ✅
- PWROK: 0V ❌
Root Cause:
- VCC3_3 = 3.09V tha — multimeter pe “OK” laga
- PMIC threshold 3.15V tha → PGOOD assert nahi hua → PWROK LOW
Solution:
- VCC3_3 regulator feedback resistor replace kiya
- VCC3_3 = 3.3V exact ✅ → PGOOD ✅ → PWROK ✅ → PLTRST# ✅ → POST ✅
Key Learning: Rail “present” hona aur “tolerance mein” hona alag hai — PMIC strictly check karta hai
Case Study 2: SLP_S4# Stuck LOW
Symptom: Power button press — koi response nahi, fan bhi nahi
Diagnosis:
- RSMRST#: OK ✅
- SLP_S5#: HIGH ✅
- SLP_S4#: 0V stuck ❌ FAULT FOUND
- Core rails: Nahi aaye (당연히)
- PWROK: 0V
Root Cause:
- PCH ke SLP_S4# output line par shorted capacitor tha
- Core rails kabhi enable nahi hue → PWROK nahi aaya
Solution:
- Shorted capacitor remove kiya
- SLP_S4# HIGH ✅ → Core rails ✅ → PWROK ✅ → POST ✅
Key Learning: PWROK nahi hai to SLP signals pehle check karo — core rails wahan se aati hain
Case Study 3: PWROK OK But Still Dead
Symptom: PWROK = 3.3V ✅ lekin board no POST
Diagnosis:
- PWROK HIGH ✅
- PLTRST#: 0V ❌
Root Cause:
- PCH ka VCCIO rail missing tha
- PCH PWROK receive kar raha tha lekin khud power nahi tha
- PCH PLTRST# generate nahi kar pa raha tha
Solution:
- VCCIO regulator replace kiya → PLTRST# ✅ → POST ✅
Key Learning: PWROK → PLTRST# chain mein PWROK ke baad PCH ke apne input rails bhi check karo
❌ Common Technician Mistakes
Mistake 1: Rails OK → PWROK Assume Kar Liya
Reality: PWROK = quality certificate hai. Rail slightly out of tolerance ho to PMIC refuse karta hai. Oscilloscope se verify karo.
Mistake 2: PWROK 0V → Seedha PCH Replace
Reality: PCH PWROK ka receiver hai, generator nahi. PCH bilkul theek hota hai — source check karo.
Mistake 3: SLP Signals Check Nahi Kiye
Reality: SLP_S4#/S5# stuck LOW → Core rails kabhi nahi aayengi → PWROK kabhi nahi aayega. Ye pehla check hona chahiye.
Mistake 4: VCCST_PWRGD Ignore Kar Diya
Reality: Ye always-on signal hai. Missing ho to PCH PWROK accept karne ki state mein hi nahi hota.
Mistake 5: PWROK PMIC Output Par Check Kiya, PCH Input Par Nahi
Reality: PMIC HIGH de raha hai lekin PCH tak nahi pahunch raha — line mein fault ho sakta hai. Hamesha PCH input pin par probe karo.
📊 Quick Reference
Signal Chain
SLP_S5# → SLP_S4# → SLP_S3# release
        ↓
Core Rails enable
        ↓
Har VRM → PGOOD
        ↓
VCCST_PWRGD + sab PGOOD → PWROK HIGH
        ↓
PWROK → PCH → PLTRST# release
        ↓
CPU Boot
Voltage Reference Table
| Signal | Normal Value | Fault |
|---|---|---|
| VCCST_PWRGD | 3.3V (always-on) | 0V = SUS well problem |
| SLP_S4# / S5# | HIGH after button | LOW = PCH/RSMRST# issue |
| PGOOD (per VRM) | HIGH when rail stable | 0V = VRM fault |
| PWROK | 3.3V (S0 state) | 0V = PGOOD ya EC issue |
| PLTRST# | 3.3V (after PWROK) | 0V = PWROK ya PCH issue |
Platform Comparison
| Platform | Signal Name | Generated By | Required Before |
|---|---|---|---|
| Intel | PWROK | PMIC / EC / VRM PGOOD | PLTRST# release |
| AMD | PWR_GOOD / SYS_PWROK | FCH PM / EC | SYS_RESET# release |
Schematic Search Keywords
- PWROK: PWROK, SYS_PWROK, PCH_PWROK, PM_PWROK, PWR_OK
- Combined PG: HWPG, ALL_PWRGD, ALL_SYS_PWRGD, SYSTEM_PWRGD
- Individual PGOOD: VCORE_PWRGD, VR_RDY, IMVP_PWRGD, MEM_PWRGD
- SLP Signals: SLP_S3#, SLP_S4#, SLP_S5#
- Suspend PG: VCCST_PWRGD, SUS_PWRGD
📝 Conclusion
Key Takeaways:
- PWROK = Quality certificate — sirf rail present nahi, tolerance ke andar honi chahiye
- PCH PWROK ka receiver hai — generator nahi. PWROK missing = source dhundo, PCH blame mat karo
- SLP_S4# / SLP_S5# pehle release honge — tabhi core rails aayengi — tabhi PWROK aayega
- VCCST_PWRGD always-on hona chahiye — missing ho to PCH PWROK accept hi nahi karega
- Har VRM ka PGOOD individually check karo — ek bhi missing ho to PWROK LOW
- Oscilloscope mandatory — multimeter rails OK dikha ke bhi PWROK missing ho sakta hai
Complete Chain:
VCCST_PWRGD → RSMRST# → SLP release →
Core Rails → PGOOD → PWROK → PLTRST# → CPU Boot
Ye chain master karo — 90%+ dead board cases is chain mein hi solve hote hain 🎯
🔗 Related Guides — Ezone Care Series
- 🔵 Laptop Motherboard Power Wells – Complete Chip Level Repair Guide
- 🔵 RTC_RST# Signal – Complete Details, Working & Testing
- 🔵 RSMRST# Resume Reset Signal – Complete Guide
- 🔵 PLTRST# Signal Kya Hai – Chip Level Repair Guide
⚠️ Disclaimer
⚠️ Ye information sirf educational purpose ke liye hai ⚠️ Chip-level repair risky hai — experience required ⚠️ Repair apni responsibility par karein ⚠️ ESD precautions mandatory (wrist strap, anti-static mat) ⚠️ Wrong diagnosis se permanent damage possible
Work safely, repair responsibly!
© Educational Content – Share Knowledge, Grow Together Blog by Ezone Care – ezonecare.com
thank you so much for this informative content.